Introduction
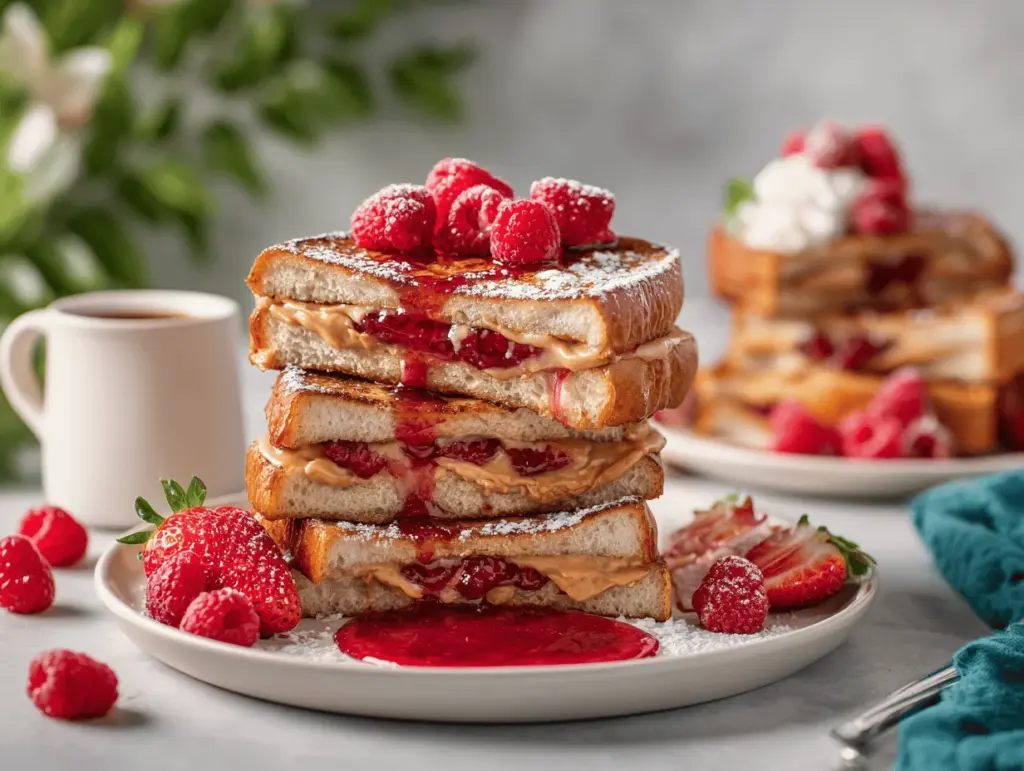
The smell of sizzling bread stuffed with oozy peanut butter and sweet jelly? Honestly, it takes me right back to Saturday mornings as a kid—bare feet on cold tile, eyes barely open, and the promise of something sweet and gooey waiting at the kitchen table. Peanut Butter & Jelly French Toast isn’t just a breakfast; it’s pure nostalgia wrapped in a crispy, golden hug. I first whipped this up on a whim when my son begged for “something fun” for breakfast during a snow day. We were all out of cereal, but we had plenty of peanut butter, jelly, and the never-ending loaf of bread. You know what? It was a hit—the kind of recipe that had everyone at the table grinning before the first bite.
Why do I keep coming back to this peanut butter & jelly French toast? For one, it’s ridiculously easy. You layer, dip, fry, and—boom—breakfast magic. It’s also the ultimate crowd-pleaser. My family requests it for birthdays, sleepovers, and pretty much any lazy Sunday. The best part? It’s customizable. Raspberry, grape, strawberry—whatever jelly you love, it works. And you don’t need to be a pro chef to pull this off. I’ve tested this recipe more times than I can count, tweaking the egg mixture for richness and getting the cook time just right for that dreamy, custardy center.
If you’re after a breakfast that’s fun, satisfying, and a little bit nostalgic, peanut butter & jelly French toast is your ticket. It works for busy parents, brunch enthusiasts, college students—basically anyone with a sweet tooth and a soft spot for comfort food. So grab your favorite peanut butter, your go-to jam, and let’s make some sweet breakfast magic.
Why You’ll Love This Recipe
- Quick & Easy: Comes together in under 30 minutes, making it perfect for hectic mornings, lazy weekends, or even a last-minute breakfast-for-dinner situation.
- Simple Ingredients: Everything you need is probably in your kitchen right now—no fancy ingredients or special trips to the store.
- Perfect for Brunch & Special Occasions: This peanut butter & jelly French toast is a showstopper for brunch spreads, birthday breakfasts, or fun sleepover mornings.
- Crowd-Pleaser: Kids absolutely adore it (seriously, I’ve never met a child who didn’t want seconds), but adults love the nostalgic twist too.
- Unbelievably Delicious: The combo of creamy peanut butter, fruity jelly, and crispy French toast is just next-level comforting. One bite and you’ll see what I mean.
This isn’t your average French toast. What makes this peanut butter & jelly French toast different? For starters, sandwiching the peanut butter and jelly between slices of soft bread creates a warm, gooey center that’s genuinely magical. I blend a touch of vanilla and cinnamon into the egg mixture for extra flavor. My secret? Letting the sandwiches soak just long enough to get custardy without falling apart (learned that the hard way!).
It’s more than just breakfast—it’s the kind of recipe that makes you slow down, savor each bite, and maybe even forget about your to-do list for a few minutes. There’s something so soul-soothing about classic flavors reinvented in a new way, especially when the result is this easy to pull off. Whether you’re impressing guests or treating yourself, this peanut butter & jelly French toast is a little bit of everyday magic.
What Ingredients You Will Need
This peanut butter & jelly French toast recipe uses simple, wholesome ingredients to deliver big flavor and cozy comfort. Most of these are pantry staples, so there’s a good chance you already have everything you need. Here’s what you’ll need for sweet breakfast magic:
- Bread (8 slices): Soft white, brioche, or whole wheat work best (day-old bread holds up even better—less soggy!).
- Peanut Butter (about 1/2 cup / 120g): Creamy or crunchy, your call. I like using natural peanut butter for a little less sugar, but Skippy or Jif are classic for that nostalgic taste.
- Jelly or Jam (about 1/2 cup / 120g): Grape, strawberry, raspberry—any flavor you love. Go for a thick, good-quality jam for less mess. (Homemade is also amazing if you have it!)
- Eggs (3 large): Room temp is best for blending smoothly.
- Milk (3/4 cup / 180ml): Whole milk for creamy richness, but any dairy or non-dairy milk works (almond, oat, soy).
- Vanilla Extract (1 tsp / 5ml): Adds warmth and depth to the custard base. Real vanilla makes a difference!
- Ground Cinnamon (1/2 tsp / 1g): For cozy, sweet flavor. You can skip if you’re not a cinnamon fan, but I wouldn’t.
- Butter (for cooking, about 2 tbsp / 28g): Unsalted or salted. You can swap for coconut oil if dairy-free.
- Optional Toppings: Powdered sugar, extra peanut butter or jelly, sliced bananas, fresh berries, maple syrup.
Ingredient tips: If you’re gluten-free, use your favorite GF sandwich bread. Prefer almond or sunflower butter? Go for it! I’ve even swapped in blueberry preserves when I was out of strawberry and it worked beautifully. Just don’t use bread that’s too thin or flimsy, or your sandwiches might fall apart during soaking.
Substitution ideas: For a vegan version, use a plant-based milk and an egg replacer (like flax eggs). Want it lower in sugar? Use a no-sugar-added jam and natural peanut butter. You can even go wild and use Nutella instead of peanut butter for a chocolatey twist.
Keep it simple, or play around with what’s in your pantry—the beauty of peanut butter & jelly French toast is how flexible (and forgiving) it is!
Equipment Needed
- Large Skillet or Griddle: Nonstick is easiest for cleanup, but any heavy-bottomed pan works. I’ve used my old cast iron and it gives a great crispy edge.
- Mixing Bowl: For whisking the eggs, milk, cinnamon, and vanilla.
- Whisk or Fork: For blending the custard mixture. A fork works in a pinch, but a whisk is faster.
- Spatula: A wide, thin spatula makes flipping your French toast sandwiches less stressful (trust me, I’ve broken a few with a small spatula).
- Bread Knife: For slicing bread if needed, or for halving the finished French toast diagonally for that classic diner look.
- Shallow Dish or Pie Plate: To soak your peanut butter & jelly sandwiches in the custard. A pie plate is perfect, but even a rimmed plate works.
- Measuring Cups & Spoons: For accuracy, especially with the custard. But honestly, I eyeball the cinnamon sometimes!
Budget tip: You don’t need any fancy gadgets. I’ve made this recipe with just a frying pan, a cereal bowl, and a fork on vacation. If you use cast iron, just remember to season it after cleaning to keep it nonstick. For easy cleanup, soak your bowl and utensils in warm water right after making the custard so nothing sticks.
Preparation Method
-
Make the Sandwiches: Lay out 4 slices of bread. Spread each with about 2 tbsp (30g) peanut butter. On the other 4 slices, spread 2 tbsp (30g) jelly or jam. Sandwich the peanut butter and jelly sides together. Press gently so they stick.
Tip: Don’t overfill—too much jelly and it’ll ooze out in the pan. Been there, mopped that up! -
Whisk the Custard: In a mixing bowl, whisk together 3 large eggs, 3/4 cup (180ml) milk, 1 tsp (5ml) vanilla extract, and 1/2 tsp (1g) ground cinnamon. Make sure it’s smooth and the cinnamon is evenly distributed. (This takes about 1-2 minutes.)
Sensory cue: The mixture should be creamy yellow with little cinnamon flecks—smells like dessert already! -
Soak the Sandwiches: Pour the custard into a shallow dish. Carefully dip each sandwich into the mixture, letting it soak for about 20-30 seconds per side. You want the bread to absorb the custard, but not get soggy enough to fall apart.
Warning: Don’t walk away! If you let it soak too long, you’ll end up with a mushy mess (trust me, I’ve done it). -
Preheat the Pan: Heat a large skillet or griddle over medium heat (about 2-3 minutes). Add 1/2 tbsp (7g) butter and swirl to coat the bottom. Wait until it’s melted and slightly bubbly.
Tip: If the butter turns brown fast, the pan is too hot—turn it down a notch. -
Cook the French Toast: Place the soaked sandwiches in the skillet (work in batches if needed). Cook for 3-4 minutes per side, until golden brown and crispy on the outside. Flip carefully with a wide spatula.
Sensory cue: Listen for a gentle sizzle—if it’s splattering, lower the heat. The outside should be deeply golden, but not burnt. - Repeat as Needed: Add more butter for each batch, and keep cooked French toast warm on a plate in a low oven (about 200°F / 93°C) if making a big batch.
-
Serve: Slice each sandwich diagonally. Top with powdered sugar, extra peanut butter, fresh berries, or a drizzle of maple syrup—whatever you crave!
Personal note: My kids go wild for banana slices and a dusting of powdered sugar. No wrong answers here.
Troubleshooting tips: If your bread falls apart, try using slightly stale bread next time. If the center is too wet, cook a bit longer on lower heat. I’ve learned that patience (and a good spatula) are key!
Cooking Tips & Techniques
- Use Stale or Day-Old Bread: It holds up better after soaking and gives a perfect, custardy texture inside without turning mushy. Fresh bread works, but you’ll need a gentle hand.
- Don’t Rush the Soak: Letting each sandwich sit in the custard for at least 20 seconds per side makes sure you get that creamy inside. But wait too long, and it’ll fall apart—just a quick dunk for softer sandwich bread.
- Watch Your Heat: Medium heat is your friend. Too hot, and the outside burns before the center cooks. Too low, and the bread dries out. I’ve scorched a few slices trying to multitask—lesson learned!
- Flip Gently: Use a wide spatula and flip slowly to avoid squishing the filling out. If the sandwich feels floppy, let it cook another minute before flipping.
- Batch Cooking: If you’re making a bunch, keep finished French toast warm in a low oven so everyone can eat together. No one likes cold, soggy French toast.
- Customize the Custard: Add a splash of orange zest, a pinch of nutmeg, or even a dash of maple syrup for extra flavor. I sometimes toss in a tablespoon of cream for richness.
- Clean as You Go: Custard can get sticky—rinse bowls and utensils right after use for easier cleanup.
Honestly, I’ve had my fair share of soggy disasters and burnt edges. But with a little practice (and a watchful eye on the skillet), you’ll have peanut butter & jelly French toast that’s crispy, golden, and downright magical, every single time.
Variations & Adaptations
- Dietary Swaps: For a gluten-free version, use your favorite sturdy gluten-free sandwich bread. To make it vegan, swap in a plant-based milk (like oat or almond) and use flax eggs (1 tbsp ground flaxseed + 2.5 tbsp water per egg, let sit until thickened).
- Flavor Twists: Switch up the nut butter—try almond, cashew, or sunflower seed butter for a new taste. Use different jams or even a layer of sliced fruit (like bananas or strawberries) instead of jelly.
- Chocolate Lovers: Swap peanut butter for Nutella, or add a sprinkle of mini chocolate chips inside each sandwich before dipping. It’s like dessert for breakfast!
- Cooking Methods: If you want a lighter version, bake the dipped sandwiches on a lined baking sheet at 350°F (177°C) for about 20 minutes, flipping halfway. They come out a bit less crispy, but it’s hands-off and great for big batches.
- Allergen Notes: For nut allergies, use sunflower or soy nut butter. Double-check your bread and jam for hidden allergens if you’re serving a crowd.
My favorite twist? I sometimes add a thin layer of sliced strawberries inside each sandwich along with the jelly. It tastes like summer in every bite! Don’t be afraid to play around—this recipe loves a little creativity.
Serving & Storage Suggestions
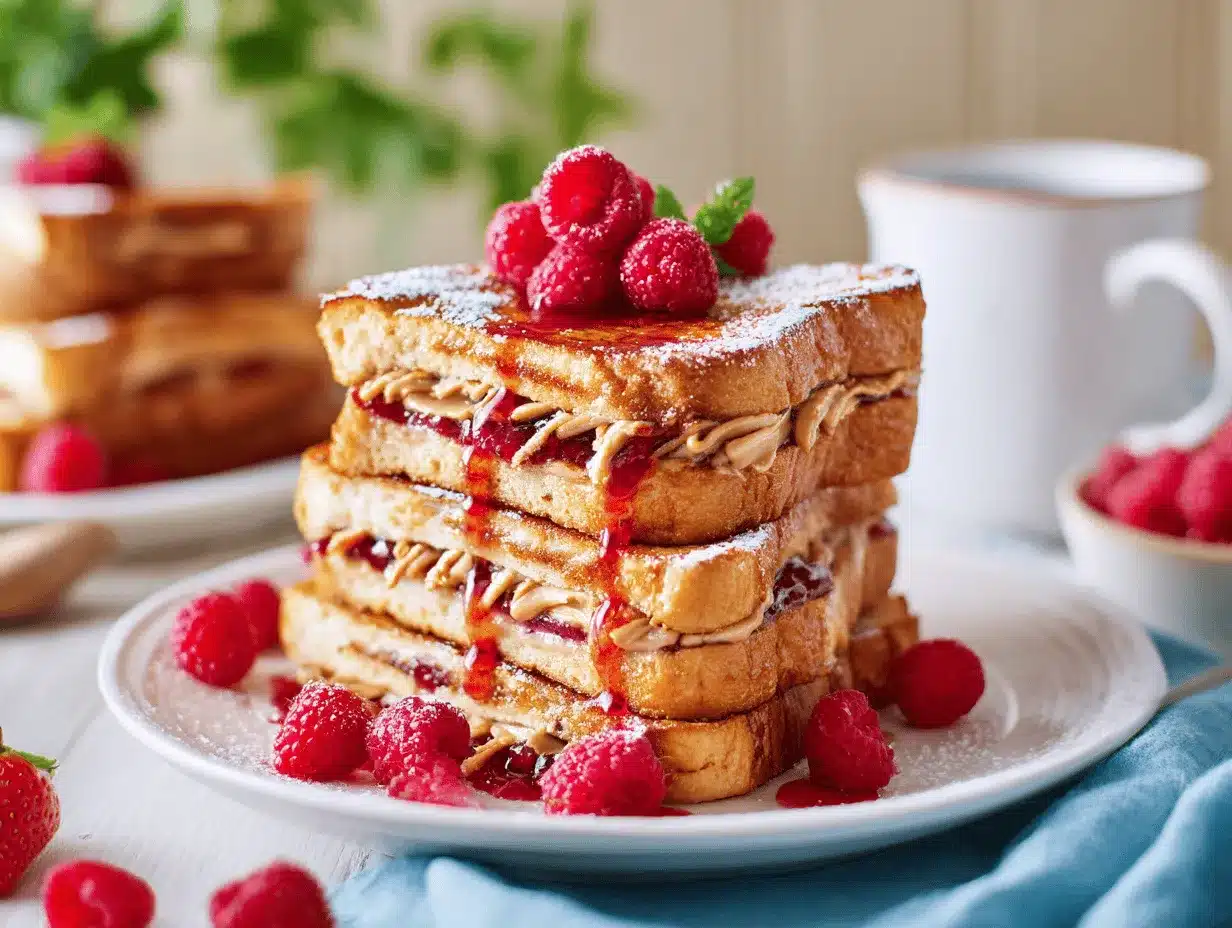
Serve your peanut butter & jelly French toast hot off the skillet, sliced diagonally for that classic diner look. Dust with powdered sugar, drizzle with warm maple syrup, or add extra peanut butter and jelly on top for a double hit of flavor. Fresh berries, banana slices, or even a sprinkle of chopped nuts make it feel extra special.
This sweet breakfast pairs beautifully with strong coffee, hot cocoa, or a tall glass of cold milk. If you’re feeling fancy, serve alongside crispy bacon, scrambled eggs, or a fruit salad for a true brunch feast.
Leftovers? Pop extra slices in an airtight container in the fridge for up to 2 days. To reheat, warm in a toaster oven or skillet over low heat until the outside crisps back up. You can freeze cooked French toast, too—just wrap each sandwich in foil and freeze for up to 2 months. Reheat straight from frozen in a 350°F (177°C) oven for 10-12 minutes.
Honestly, the flavors get even richer after a day in the fridge—so go ahead and make a double batch if you have a hungry crowd!
Nutritional Information & Benefits
Each serving of peanut butter & jelly French toast (one sandwich) is about 350-400 calories, depending on bread and toppings. You’ll get a boost of protein from the eggs and peanut butter—great for staying full until lunch. Using whole grain bread adds fiber, and you can control sugar by choosing natural peanut butter and low-sugar jam.
This recipe can be tailored for many diets—gluten-free, dairy-free, and even vegan with the right swaps. Please note it does contain common allergens: peanuts, eggs, and wheat (unless adapted). From a wellness perspective, this breakfast is all about balance: a little indulgence, some protein, and a big smile to start your day.
Conclusion
If you’re looking for a breakfast that’s easy, crowd-pleasing, and just plain fun, this peanut butter & jelly French toast recipe is your answer. It’s nostalgic comfort food with a twist, perfect for lazy weekends, special mornings, or whenever you need a little sweet magic. I love it because it brings back childhood memories—and now it creates new ones with my own family.
Try it, make it your own, and don’t be afraid to play with flavors or toppings. I’d love to hear how you customize your peanut butter & jelly French toast—leave a comment with your favorite combos or share your breakfast masterpiece with friends. Let’s keep breakfast magical, one slice at a time!
Frequently Asked Questions
Can I use any type of bread for peanut butter & jelly French toast?
Yes! Soft white, brioche, whole wheat, or even gluten-free bread all work. Day-old bread is best for soaking up the custard without falling apart.
What’s the best way to keep French toast warm for a crowd?
Place cooked French toast on a baking sheet in a 200°F (93°C) oven while you finish the rest. This keeps it crispy and warm until everyone’s ready to eat.
Can I make peanut butter & jelly French toast ahead of time?
You can prepare and cook the sandwiches, then refrigerate or freeze. Reheat in a toaster oven or regular oven for the best texture—just don’t microwave, or it’ll get soggy.
Is there a way to make this recipe nut-free?
Absolutely! Use sunflower seed butter or soy nut butter instead of peanut butter. Always double-check bread and jam labels for hidden allergens.
What’s the best jelly or jam to use?
Any flavor you love! Strawberry, grape, raspberry, or even apricot all work. Just choose a thick, spreadable jam to prevent leaks during cooking.
Pin This Recipe!


Peanut Butter & Jelly French Toast
- Total Time: 25 minutes
- Yield: 4 servings 1x
Description
This Peanut Butter & Jelly French Toast is a nostalgic, crowd-pleasing breakfast that combines creamy peanut butter, fruity jelly, and crispy golden French toast. It’s quick, easy, and endlessly customizable for a sweet start to any morning.
Ingredients
- 8 slices soft white, brioche, or whole wheat bread (day-old preferred)
- 1/2 cup (about 120g) peanut butter (creamy or crunchy)
- 1/2 cup (about 120g) jelly or jam (any flavor)
- 3 large eggs
- 3/4 cup (180ml) milk (whole, dairy, or non-dairy)
- 1 teaspoon vanilla extract
- 1/2 teaspoon ground cinnamon
- 2 tablespoons (28g) butter, for cooking
- Optional toppings: powdered sugar, extra peanut butter or jelly, sliced bananas, fresh berries, maple syrup
Instructions
- Lay out 4 slices of bread. Spread each with about 2 tablespoons peanut butter.
- Spread the remaining 4 slices with about 2 tablespoons jelly or jam each.
- Sandwich the peanut butter and jelly sides together. Press gently so they stick.
- In a mixing bowl, whisk together eggs, milk, vanilla extract, and ground cinnamon until smooth and evenly combined.
- Pour the custard mixture into a shallow dish.
- Carefully dip each sandwich into the custard, soaking for 20-30 seconds per side (do not oversoak).
- Heat a large skillet or griddle over medium heat. Add about 1/2 tablespoon butter and swirl to coat.
- Place soaked sandwiches in the skillet (work in batches if needed). Cook for 3-4 minutes per side, until golden brown and crispy. Flip carefully.
- Add more butter for each batch as needed. Keep cooked French toast warm in a low oven (200°F) if making a large batch.
- Slice each sandwich diagonally and serve hot with desired toppings.
Notes
Use day-old or slightly stale bread for best texture. For gluten-free or vegan versions, substitute with GF bread and plant-based milk/egg replacer. Don’t oversoak sandwiches to avoid sogginess. Keep finished French toast warm in a low oven if making a large batch. Customize with different nut butters, jams, or add-ins like sliced fruit or chocolate chips.
- Prep Time: 10 minutes
- Cook Time: 15 minutes
- Category: Breakfast
- Cuisine: American
Nutrition
- Serving Size: 1 sandwich
- Calories: 375
- Sugar: 15
- Sodium: 410
- Fat: 18
- Saturated Fat: 5
- Carbohydrates: 41
- Fiber: 3
- Protein: 13
Keywords: peanut butter and jelly french toast, PB&J french toast, sweet breakfast, kid-friendly breakfast, brunch, nostalgic breakfast, easy french toast, stuffed french toast