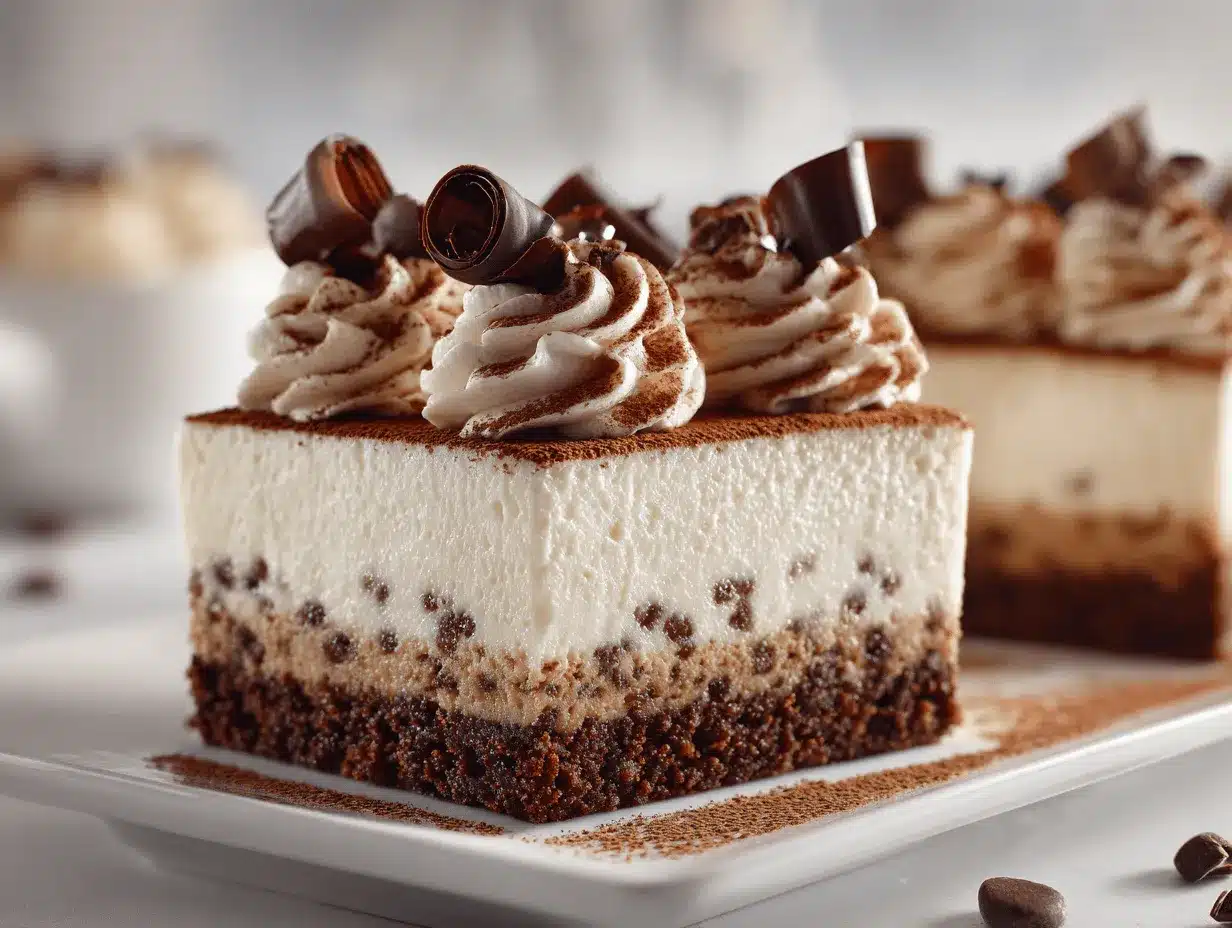
The first time the aroma of freshly brewed espresso met the creamy tang of cheesecake in my kitchen, I knew I had stumbled onto something special. Imagine that luscious, coffee-soaked bite of classic tiramisu—now, swirl it with the rich, velvety goodness of a New York-style cheesecake. That’s exactly what this irresistible tiramisu cheesecake recipe delivers. Every forkful is a party of flavors: bold coffee, sweet mascarpone, a hint of cocoa, and a buttery cookie crust. If you’re after a dessert that makes friends say, “Wait, you made this?!”—you’re in the right spot.
I whipped up this tiramisu cheesecake for a birthday brunch, and honestly, it vanished before anyone even touched the fruit salad. There’s just something magical about that creamy texture and the way the espresso-soaked ladyfingers sneak in little pops of coffee flavor. This recipe is near and dear to me because it combines two of my all-time favorites, and it’s become a regular for celebrations, potlucks, and even random Tuesday nights when I want to treat myself. It’s truly a homemade dessert twist that brings the best of both worlds to your table.
If you’re a fan of classic tiramisu, or if cheesecake is your jam, this easy tiramisu cheesecake recipe is going to blow you away. It’s not just delicious—it’s show-stopping! Whether you’re planning a dinner party or need something special for the holidays, this dessert is your new secret weapon. Plus, you don’t need to be a pro baker. I’ve tested this recipe more times than I can count, and I’ll walk you through each step so you’ll feel like a pastry chef, even if you’re just baking in your pajamas.
Why You’ll Love This Tiramisu Cheesecake Recipe
- Quick & Easy: This tiramisu cheesecake comes together with less fuss than you’d think—no complicated water baths or fancy equipment required.
- Simple Ingredients: Most items are probably already in your pantry or fridge. No need to hunt down hard-to-find stuff.
- Perfect for Parties: This cheesecake looks super impressive on the table and serves a crowd. It’s ideal for birthdays, holidays, or just because.
- Crowd-Pleaser: Both kids and adults rave about it—there’s something about that creamy, coffee-kissed filling that wins everyone over.
- Unbelievably Delicious: The balance of coffee, cocoa, and creamy cheesecake is pure comfort food. One bite and you’ll see what I mean.
What really sets this tiramisu cheesecake recipe apart is the way it brings together the best of both desserts. Instead of just layering flavors, I blend real espresso into the cheesecake base and use mascarpone for that authentic tiramisu vibe. The ladyfingers aren’t just decorative—they’re soaked in coffee and tucked right into the crust, so every bite gives you a little surprise.
I’ve tried a lot of tiramisu-inspired desserts, but this one stands out for its texture and depth. Blending the ingredients until ultra-smooth makes the cheesecake so creamy, and that hint of Kahlúa (or coffee liqueur) takes it to the next level. You know, it’s the kind of dessert that makes you pause mid-bite and just savor the moment. It’s comfort food with a twist—easier and lighter than you might expect, but still rich and satisfying. If you want to wow your guests (or yourself), this is the cheesecake for you.
What Ingredients You Will Need
This tiramisu cheesecake recipe uses a lineup of familiar, easy-to-find ingredients. I love how you don’t need anything fancy to create something truly memorable. Everything plays a role in building that signature flavor and texture.
- For the Crust:
- 20-24 ladyfingers (about 150g), crisp style (for that classic tiramisu bite and coffee absorption)
- 1/4 cup (60ml) strong brewed espresso or coffee, cooled (soaks into the ladyfingers for deep flavor)
- 2 tablespoons (30g) granulated sugar
- 6 tablespoons (85g) unsalted butter, melted
- For the Cheesecake Filling:
- 16 ounces (450g) cream cheese, room temperature (I use Philadelphia for best texture)
- 8 ounces (225g) mascarpone cheese, room temperature (for authentic tiramisu flavor)
- 1 cup (200g) granulated sugar
- 3 large eggs, room temperature
- 1/4 cup (60ml) sour cream (adds tang and silkiness)
- 1/4 cup (60ml) strong espresso or coffee, cooled
- 2 tablespoons (30ml) coffee liqueur (like Kahlúa; optional but recommended for depth)
- 2 teaspoons pure vanilla extract
- 1 tablespoon (8g) all-purpose flour (helps with structure)
- 1/4 teaspoon salt
- For the Topping:
- 1 cup (240ml) heavy whipping cream, cold
- 2 tablespoons (15g) powdered sugar
- 1/2 teaspoon vanilla extract
- Unsweetened cocoa powder, for dusting
Ingredient Tips: If you can’t find mascarpone, full-fat cream cheese works in a pinch (but the flavor’s a bit different). For gluten-free, use gluten-free ladyfingers or a gluten-free cookie crust. Swap coffee liqueur for extra espresso if you want zero alcohol. And if you’re feeling fancy, sprinkle some dark chocolate shavings on top. I always say, don’t stress over perfection—use what you have on hand!
Equipment Needed
- 9-inch (23cm) springform pan (essential for easy removal; a deep cake pan can work, but lining with parchment is a must)
- Electric mixer or stand mixer (for a super smooth filling—you can mix by hand, but it’s a workout!)
- Mixing bowls (at least two—one for the crust, one for the filling)
- Measuring cups and spoons
- Rubber spatula (for scraping every last bit of batter—trust me, you don’t want to waste it)
- Offset spatula or butter knife (for smoothing the top)
- Fine mesh sieve (for dusting cocoa powder on top—makes it look fancy without any effort)
- Parchment paper (optional, but helps prevent sticking)
If you don’t own a springform pan, you can use a deep pie dish, but serve it straight from the dish. I’ve tried both—springform is definitely easier when you want those clean, Instagram-worthy slices. For maintenance, wash your springform pan by hand to keep it sealing well; I learned that the hard way after running it through the dishwasher too many times. Budget-friendly mixers work fine here—no need for a pro stand mixer unless you bake a ton.
How to Make Tiramisu Cheesecake – Step by Step
- Prep the Pan: Grease your 9-inch (23cm) springform pan lightly with butter or nonstick spray. Line the bottom with a round of parchment paper for easy removal. Preheat your oven to 325°F (163°C).
- Make the Crust:
- Arrange ladyfingers across the bottom of the pan, breaking to fit if needed. You want a snug, single layer.
- Brush or drizzle the ladyfingers evenly with 1/4 cup (60ml) cooled espresso. Allow them to soak for a minute.
- Melt 6 tablespoons (85g) butter and stir in 2 tablespoons (30g) sugar. Pour over the ladyfingers and gently press down to compact the crust.
- Bake crust for 8-10 minutes. It’ll smell amazing! Remove and let cool slightly.
- Make the Filling:
- In a large mixing bowl, beat 16oz (450g) cream cheese and 8oz (225g) mascarpone until smooth and creamy—about 2 minutes. Scrape down the sides often.
- Add 1 cup (200g) sugar and mix until combined.
- Beat in eggs, one at a time, on low speed.
- Add 1/4 cup (60ml) sour cream, 1/4 cup (60ml) espresso, 2 tablespoons (30ml) coffee liqueur, and 2 teaspoons vanilla. Mix just until blended.
- Sprinkle in 1 tablespoon (8g) flour and 1/4 teaspoon salt. Mix on low just until smooth. Don’t overmix—this keeps the cheesecake creamy.
- Assemble and Bake:
- Pour filling over the cooled crust. Smooth the top with a spatula.
- Tap the pan gently on the counter to release air bubbles.
- Bake at 325°F (163°C) for 55-65 minutes, until edges are set but the center jiggles slightly when nudged. (Don’t worry if it puffs up a bit—it’ll settle as it cools.)
- If you notice cracks starting to form, turn off the oven and let the cheesecake sit inside, door slightly ajar, for 30 minutes. This slow cooling helps prevent cracking.
- Cool Completely:
- Run a thin knife around the edge to loosen. Cool to room temperature (about 2 hours), then chill in the fridge at least 4 hours, preferably overnight. The flavor deepens as it rests.
- Make the Topping:
- Whip 1 cup (240ml) heavy cream with 2 tablespoons (15g) powdered sugar and 1/2 teaspoon vanilla until soft peaks form.
- Spread or pipe over chilled cheesecake. Dust generously with cocoa powder using a sieve.
- Serve:
- Release the springform pan. Slice with a hot, clean knife for tidy edges. Wipe between slices for best presentation.
Notes: If your cheesecake cracks, don’t sweat it—whipped cream covers everything. If the filling seems too runny, chill longer before slicing. The coffee liqueur is optional, but adds a lovely grown-up twist. I always make this a day ahead for stress-free entertaining!
Cooking Tips & Techniques for Tiramisu Cheesecake
- Room Temp Ingredients: Let your cream cheese, mascarpone, and eggs sit out for 30-60 minutes—this helps everything blend smoothly and prevents lumps. Cold ingredients can make the batter curdle, and trust me, it’s a pain to fix!
- Don’t Overmix: After adding eggs, mix on low just until incorporated. Overbeating whips in air, which can cause cracks or a dense texture.
- Bake Low and Slow: Cheesecake likes gentle heat. If your oven runs hot, tent with foil halfway through to prevent over-browning.
- Cracking Troubles? My early cheesecakes always cracked—letting it cool slowly in the oven helps. If cracks do form, just cover them with whipped cream and cocoa. No one will know!
- Multi-tasking: While the crust bakes, prep the filling. It saves time and keeps things moving, especially if you’re baking for a crowd.
- Testing for Doneness: Give the pan a gentle shake—if the edges are set and the center jiggles slightly (like Jell-O), you’re good. Overbaking can make the cheesecake dry.
- Chill Time: Four hours minimum in the fridge is non-negotiable. Overnight is better for the best flavor and texture.
Honestly, my first tiramisu cheesecake was a little dry and cracked because I forgot to cool it slowly. Now, I always leave it in the turned-off oven with the door cracked for at least 30 minutes. Little things like that make a huge difference. Also, always taste your espresso before using—it should be strong but not bitter, since it’s the backbone of the flavor.
Variations & Adaptations
- Gluten-Free: Swap the ladyfingers for gluten-free ladyfingers or use a gluten-free vanilla cookie base. I’ve done this for a friend and the results were just as dreamy.
- Alcohol-Free: Leave out the coffee liqueur and add a splash more espresso. The flavor is still rich and satisfying.
- Seasonal Twist: For a summer version, add a layer of fresh raspberries between the crust and filling—tangy berries pair beautifully with coffee and cream.
- Chocolate Lover’s: Stir a handful of mini chocolate chips into the batter or swirl melted chocolate on top before baking.
- Mini Cheesecakes: Use a muffin tin lined with cupcake papers for adorable, single-serve tiramisu cheesecakes. Bake for about 20-25 minutes instead of an hour.
- Dairy-Free Adaptation: Use dairy-free cream cheese and coconut cream (chilled and whipped) for the topping. The flavor shifts a little, but it’s still delicious—my cousin who’s lactose-intolerant swears by it.
One of my favorite tweaks was adding a thin layer of Nutella between the crust and filling for a chocolate-hazelnut surprise. Don’t be afraid to play around—this cheesecake is super forgiving!
Serving & Storage Suggestions
Serve your tiramisu cheesecake chilled, straight from the fridge. For the prettiest slices, use a hot, clean knife and wipe between each cut. I love garnishing with a shower of cocoa powder and a few chocolate curls for extra flair—Pinterest-worthy, you know?
This cheesecake pairs perfectly with strong coffee, a glass of dessert wine, or even bubbly if you’re celebrating. If you want to go all out, serve alongside fresh berries or a drizzle of chocolate sauce.
To store, cover the cheesecake tightly and refrigerate for up to 5 days. The flavor actually gets better after a day or two—so it’s a great make-ahead dessert. For longer storage, freeze individual slices wrapped in plastic and foil for up to 2 months. Thaw overnight in the fridge. To refresh, let sit at room temp for 10-15 minutes before serving to soften the texture.
Nutritional Information & Benefits
Each slice of tiramisu cheesecake (based on 12 servings) has about 420 calories, 29g fat, 34g carbs, and 6g protein. The mascarpone and cream cheese bring calcium and protein, while eggs add a little extra nutrition. Of course, this is still a dessert, so balance is key!
This recipe can fit gluten-free diets if you swap the crust. For a lower-carb version, try using a nut-based crust and a sugar substitute—just note the flavor will change a bit. Allergens include dairy, eggs, and gluten (if using regular ladyfingers). Personally, I love that a small slice satisfies my sweet tooth and gives me that comforting, “special treat” feeling without going overboard.
Conclusion
If you’re looking for a show-stopping dessert that’s equal parts comfort food and conversation starter, this tiramisu cheesecake recipe is it. It’s easy enough for a weeknight bake, but impressive enough for the fanciest celebration. The layers of creamy espresso, mascarpone, and cocoa are pure magic—even better than you’d expect.
Don’t be afraid to make it your own—swap ingredients, try fun toppings, or go mini for parties! I bake this for birthdays, family gatherings, and sometimes just to make a dull week brighter. Seeing people’s faces light up after the first bite? That’s why I keep coming back to this recipe.
If you try this tiramisu cheesecake delight, I’d love to hear how it goes! Drop a comment below, share your photos, or tag me on Pinterest with your own twist. Happy baking—may your kitchen be filled with laughter, love, and lots of cheesecake!
FAQs About Tiramisu Cheesecake
Can I make tiramisu cheesecake ahead of time?
Absolutely! This cheesecake actually tastes better after chilling for at least 4 hours, and overnight is even better. Make it a day ahead for stress-free entertaining.
What can I use instead of mascarpone?
If mascarpone isn’t available, use full-fat cream cheese. The flavor is a little tangier, but still delicious. For extra richness, add a tablespoon of heavy cream to the filling.
Can I make this recipe gluten-free?
Yes! Use gluten-free ladyfingers or swap for a gluten-free vanilla cookie crust. All other ingredients are naturally gluten-free, but always check your labels to be sure.
How do I know when the cheesecake is done?
The edges should look set, but the center will jiggle slightly when the pan is gently shaken—think Jell-O, not soup. If you overbake, it can get dry, so start checking around 55 minutes.
Can I freeze leftover tiramisu cheesecake?
Definitely! Slice and wrap tightly in plastic and foil, then freeze for up to 2 months. Thaw overnight in the fridge before serving for best texture.
Pin This Recipe!
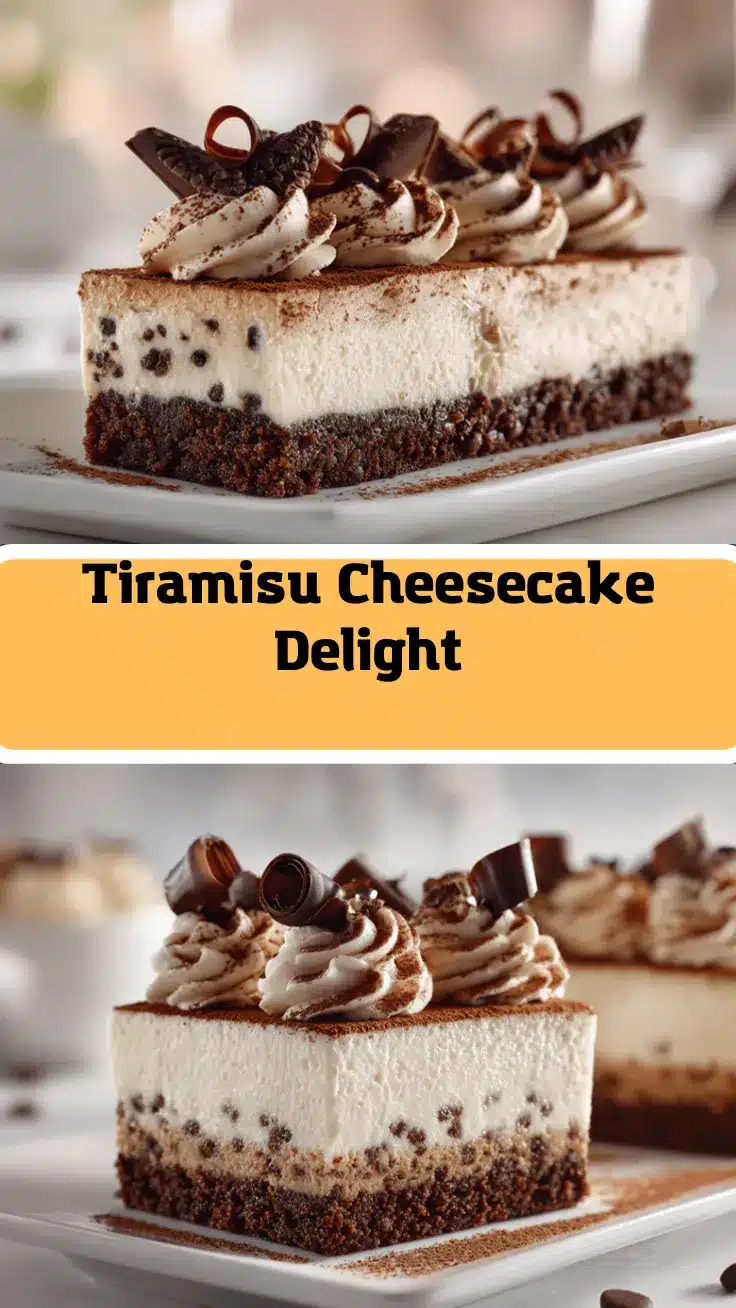
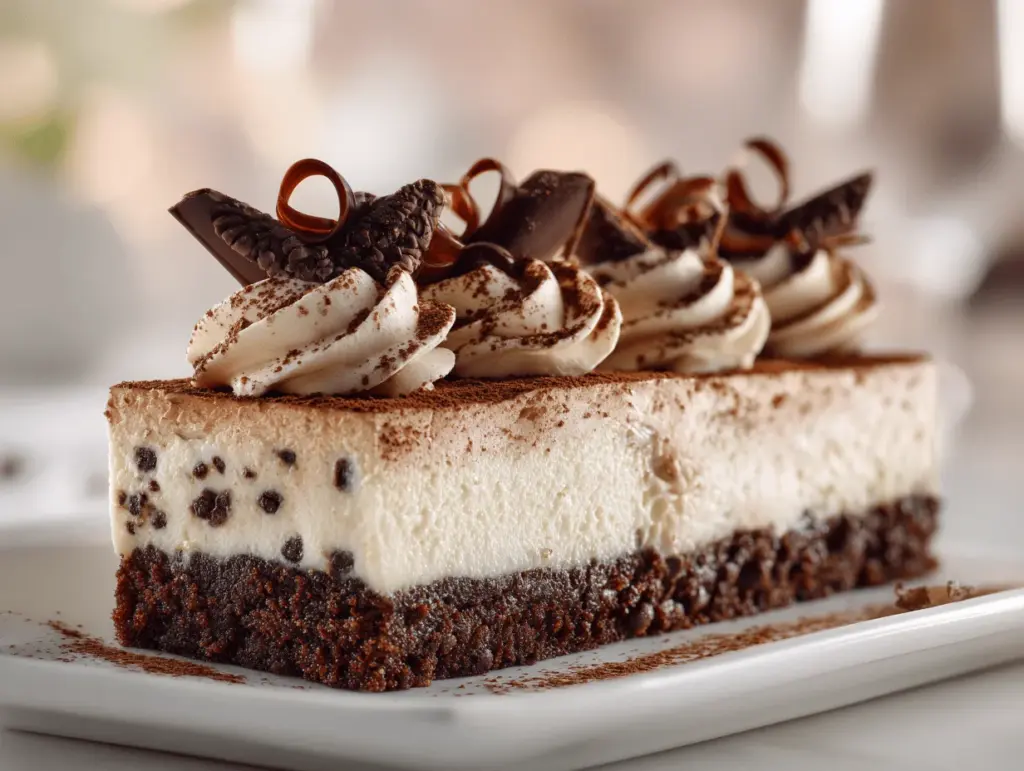
Tiramisu Cheesecake
- Total Time: 6 hours 30 minutes
- Yield: 12 servings 1x
Description
This easy homemade tiramisu cheesecake combines the creamy richness of New York-style cheesecake with the bold coffee and mascarpone flavors of classic tiramisu. It’s a show-stopping dessert perfect for parties, holidays, or any special occasion.
Ingredients
- 20–24 ladyfingers (about 5.3 oz), crisp style
- 1/4 cup strong brewed espresso or coffee, cooled
- 2 tablespoons granulated sugar
- 6 tablespoons unsalted butter, melted
- 16 ounces cream cheese, room temperature
- 8 ounces mascarpone cheese, room temperature
- 1 cup granulated sugar
- 3 large eggs, room temperature
- 1/4 cup sour cream
- 1/4 cup strong espresso or coffee, cooled
- 2 tablespoons coffee liqueur (like Kahlúa; optional)
- 2 teaspoons pure vanilla extract
- 1 tablespoon all-purpose flour
- 1/4 teaspoon salt
- 1 cup heavy whipping cream, cold
- 2 tablespoons powdered sugar
- 1/2 teaspoon vanilla extract
- Unsweetened cocoa powder, for dusting
Instructions
- Grease a 9-inch springform pan lightly with butter or nonstick spray. Line the bottom with parchment paper. Preheat oven to 325°F (163°C).
- Arrange ladyfingers in a snug, single layer across the bottom of the pan, breaking to fit if needed.
- Brush or drizzle ladyfingers evenly with 1/4 cup cooled espresso. Allow to soak for a minute.
- Melt 6 tablespoons butter and stir in 2 tablespoons sugar. Pour over ladyfingers and gently press down to compact the crust.
- Bake crust for 8-10 minutes. Remove and let cool slightly.
- In a large mixing bowl, beat cream cheese and mascarpone until smooth and creamy (about 2 minutes), scraping down sides.
- Add 1 cup sugar and mix until combined.
- Beat in eggs, one at a time, on low speed.
- Add sour cream, 1/4 cup espresso, coffee liqueur (if using), and 2 teaspoons vanilla. Mix just until blended.
- Sprinkle in flour and salt. Mix on low just until smooth. Do not overmix.
- Pour filling over cooled crust. Smooth the top with a spatula.
- Tap the pan gently on the counter to release air bubbles.
- Bake at 325°F (163°C) for 55-65 minutes, until edges are set but center jiggles slightly.
- If cracks start to form, turn off oven and let cheesecake sit inside, door slightly ajar, for 30 minutes.
- Run a thin knife around the edge to loosen. Cool to room temperature (about 2 hours), then chill in fridge at least 4 hours or overnight.
- Whip heavy cream with powdered sugar and 1/2 teaspoon vanilla until soft peaks form.
- Spread or pipe whipped cream over chilled cheesecake. Dust generously with cocoa powder.
- Release springform pan. Slice with a hot, clean knife for tidy edges, wiping between slices.
Notes
For best results, use room temperature ingredients and avoid overmixing after adding eggs. If cracks form, cover with whipped cream. Chill at least 4 hours (overnight is best) for optimal flavor and texture. For gluten-free, use gluten-free ladyfingers or a cookie crust. Coffee liqueur is optional but adds depth. Cheesecake can be made a day ahead and freezes well.
- Prep Time: 30 minutes
- Cook Time: 1 hour 5 minutes
- Category: Dessert
- Cuisine: Italian-American
Nutrition
- Serving Size: 1 slice (1/12 of cheesecake)
- Calories: 420
- Sugar: 22
- Sodium: 260
- Fat: 29
- Saturated Fat: 17
- Carbohydrates: 34
- Protein: 6
Keywords: tiramisu cheesecake, easy cheesecake, homemade dessert, party dessert, coffee cheesecake, mascarpone cheesecake, Italian dessert, New York cheesecake, holiday dessert, birthday dessert